What this gauge pack is used for
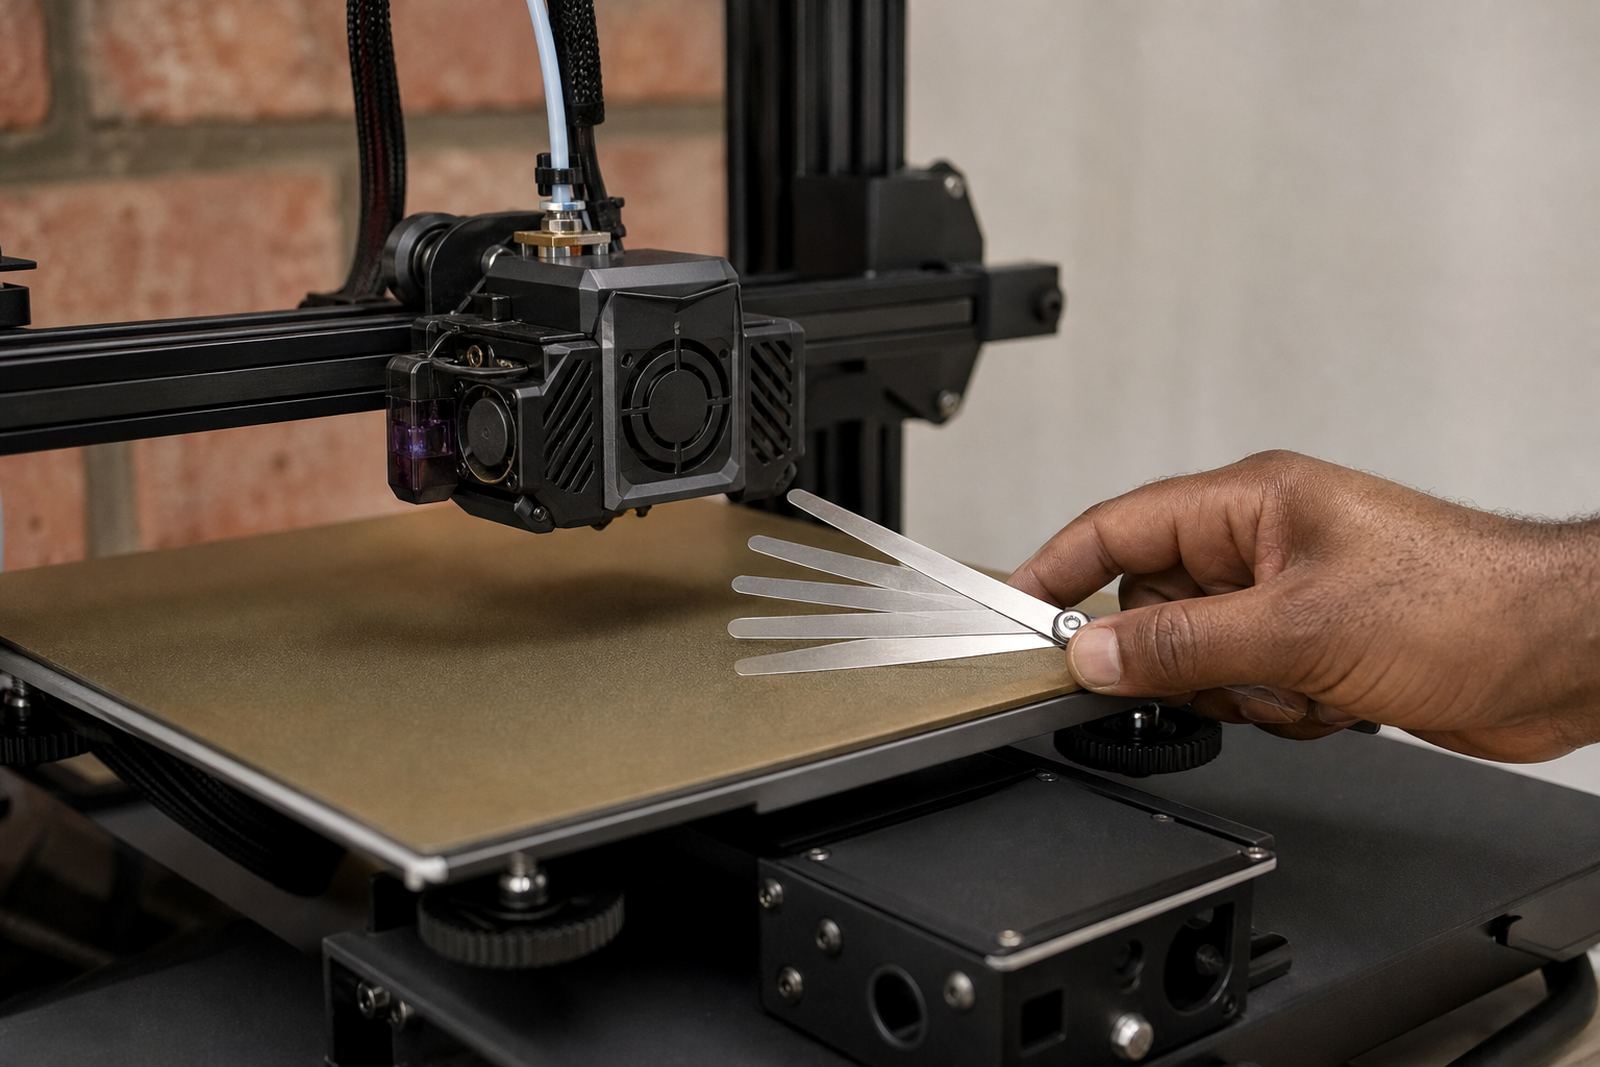
This is a compact set of thin metal blades, each cut to a known thickness, for measuring the gap between the nozzle and the build surface. In 3D printing, that small gap affects whether the first layer sticks cleanly, squashes too much, or lifts at the corners. A proper gauge pack gives you a repeatable reference instead of guessing by feel.
It suits manual levelling, assisted levelling checks, and quick verification after you fit a new build plate or change a nozzle. Many users in Gauteng and along the coast keep one near the printer because humidity, vibration, and frequent plate swaps can shift setup over time.
If you run several machines, a gauge pack makes it easier to standardise the same first-layer check across the whole line. That matters in print farms, school labs, makerspaces and small workshops where different people touch the same machine during the week.
Sizes, blade range and practical options
The pack includes multiple blade sizes so you can work in small steps rather than moving from “too tight” to “too loose”. Most users choose the common fine increments for nozzle height checks, then keep one or two thicker blades for general alignment or mechanical checks.
- Fine blades for first-layer gap checks near the bed surface
- Mid-range blades for levelling reference and quick comparison
- Sturdy case or holder to keep the blades together between jobs
- Marked thicknesses for faster selection during routine setup
For a standard FDM printer, the useful range is usually the lower end of the set because first-layer work is done in fractions of a millimetre. If you are setting up a school lab, a mixed pack is handy because learners can compare blade thicknesses and understand why the nozzle height changes the print outcome.
Where printers use glass, spring steel or PEI-based surfaces, the same gauge pack still helps. The surface changes, but the need for a consistent gap stays the same.
Where it suits best in South Africa
This pack suits users who need repeatable setup across different sites and conditions. In Pretoria East or Centurion, it is useful for quick checks after power interruptions or machine movement. In Johannesburg and Midrand, it helps farms keep the first layer consistent when machines are spread across benches and operators rotate.
It also works well for coastal users in Cape Town, Durban and Gqeberha, where moisture and temperature swings can change adhesion behaviour. When a printer starts lifting corners or scratching the bed, the first thing to check is often the nozzle gap before you blame the filament.
- Home workshops with one or two printers
- School labs needing a repeatable teaching tool
- Print farms with multiple machines and operators
- Repair benches handling nozzle swaps and bed changes
- Users troubleshooting poor first-layer adhesion
For Bloemfontein and other drier inland areas, the pack is still useful because bed levelling is not only about climate. It is about making sure each corner, and the centre, sit within the same tolerance before a long print begins.
How to use it during installation and setup
No power or gas supply is needed. The gauge pack is a manual tool, so you can use it during a load-shedding slot, in a classroom without active equipment, or at a field workstation where the printer is unplugged. That makes it practical for sites that want a simple backup method when probes or software offsets are not enough.
To use it, home the printer, disable motor holding if required by your machine, then place the chosen blade between the nozzle and the build plate. Move the bed or nozzle until the blade slides with light resistance. The aim is not to clamp it tight. You want a controlled feel that can be repeated on all corners and in the centre.
For best results, check the same blade at several points on the bed. If one side is tighter than the other, you may need to adjust the bed, inspect the carriage, or check for a warped plate. If you are fitting a new magnetic base or replacing a build surface, use the gauge pack after the hardware has settled.
Care, servicing and workshop handling
These blades are simple, but they still need a bit of care. Keep them clean, dry and flat. Wipe off filament dust, adhesive residue and finger marks after use because oils can affect the feel at the nozzle. In humid areas, especially near the coast, store the pack closed to limit corrosion on the metal edges.
Do not bend the blades to “make them fit better”. Once a blade is kinked, the thickness reading and contact feel are no longer dependable. If you are using the pack daily in a production setting, assign one person to check that the blades move smoothly in the holder and that no blade has rounded edges or visible rust.
- Store in the case after every use
- Keep away from solvents and wet benches
- Do not scrape hardened plastic off with the blade edge
- Replace the pack if the blades are bent, rusted or unreadable
If your team uses the gauge pack with school learners or new operators, add it to the same basic care routine as nozzles, build plates and cleaning cloths. A clean tool gives cleaner readings and fewer arguments about whether the first layer was set properly.
What to check before you order
Before ordering, confirm what your printer needs and how the pack will be used. A school lab may need a simple range for teaching. A print farm may need a wider range and more than one pack so machines can be serviced without waiting. If you already use a specific nozzle size or run a certain bed surface, let us know so the pack suits that setup.
- Printer model and whether the bed is manual or assisted levelling
- Nozzle size and the usual first-layer height you aim for
- Whether the pack is for one machine or several
- Storage conditions, especially in humid or dusty areas
- Any need for batch standardising across multiple printers
- Whether you want it for workshop use, school use or production checks
Clients reach us through the enquiry form on our contact page, and we help match the gauge pack to the way you print. If you are in Centurion, Pretoria, Johannesburg, Cape Town, Durban or Bloemfontein, we can also factor in local use conditions, collection or dispatch needs, and the level of repeatability your team wants from each first-layer check.
Key facts
| Product type | Feeler gauge pack for 3D printer setup and maintenance |
|---|---|
| Use case | Bed levelling, nozzle height checking, first-layer spacing verification |
| Material | Precision-cut metal blades |
| Power or gas | Not required |
| Typical use | Manual gap checking at the nozzle and build surface |
| Best suited for | Home printers, schools, print farms, repair benches and makerspaces |